


Models
>
LRDC20731SW
LRDC20731SW LG Refrigerator
Jump to:
Find Part by Name
Keep searches simple, eg. "belt" or "pump".
Diagrams for LRDC20731SW
Viewing 9 of 9


Keep searches simple, eg. "belt" or "pump".

$31.51
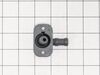
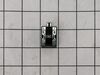
If the light inside your fridge is not coming on, or if it is staying on continuously, there may be an issue with your door switch. When the door to your fridge is closed, the button on the switch is...
In Stock
Order within the next 8 hrs and your part ships today!

In Stock
Order within the next 8 hrs and your part ships today!

$86.55
This OEM filter measures 2.5 inches deep, 12.5 inches high, 5 inches wide and roughly 1.5 lbs. It is recommended to replace this filter every six months or 300 gallons, whichever comes first. If you n...
In Stock
Order within the next 8 hrs and your part ships today!

In Stock
Order within the next 8 hrs and your part ships today!

$19.21
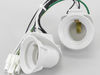
This part is the replacement water line or tube for your refrigerator. It is made of white plastic and is sold individually. This tube supplies water to the ice maker and water dispenser If your refri...
In Stock
Order within the next 8 hrs and your part ships today!

In Stock
Order within the next 8 hrs and your part ships today!

In Stock
Order within the next 8 hrs and your part ships today!

This plastic cover is a genuine OEM replacement part for your refrigerator. This part serves as the frame the glass shelf above your refrigerator crisper. To replace this part, remove the glass shelf...
In Stock
Order within the next 8 hrs and your part ships today!

$165.29
Glass is NOT included. NOTE:As per the manufacture the original support will not work with the updated crisper cover. A new support will need to be ordered.
In Stock
Order within the next 8 hrs and your part ships today!

In Stock
Order within the next 8 hrs and your part ships today!


On Order
Questions and Answers
We're sorry, but our Q&A experts are temporarily unavailable.
Please check back later if you still haven't found the answer you need.
Common Problems and Symptoms for LRDC20731SW
Viewing 8 of 8Leaking
Fixed by these parts


How to fix it
Light not working
Fixed by these parts

How to fix it
Fridge too warm
Fixed by these parts


How to fix it
Door won’t open or close
Fixed by these parts

How to fix it
Ice maker not making ice
Fixed by these parts

How to fix it
Will Not Start
Fixed by these parts
How to fix it
Clicking sound
Fixed by these parts
How to fix it
Not dispensing water
Fixed by these parts
How to fix it
Keep searches simple. Use keywords, e.g. "leaking", "pump", "broken" or "fit".
- Customer:
- Debbie from FISHER, AR
- Parts Used:
- MJU62070602, 5210JA3005E
- Difficulty Level:
- Really Easy
- Total Repair Time:
- 15 - 30 mins
- Tools:
- Screw drivers
Broken water line
Remove water filter and water filter holder. Removed cover on back of frig. Removed clip where water line connects to back of water filter. Took half inch wrench pushed in on water line lock to release line. Repeat at other end. Reverse steps to put on new line. Easy repair.
Was this instruction helpful to you?
Thank you for voting!
- Customer:
- Ronald S. from SANTA CLARITA, CA
- Parts Used:
- 4681JB1027N
- Difficulty Level:
- A Bit Difficult
- Total Repair Time:
- 30 - 60 mins
- Tools:
- Screw drivers, Socket set
Ice was building up in the bottom floor of the freezer
This refrigerator/freezer problem had been escalating for almost a year, requiring me to frequently knock the ice buildup free with a rubber mallet. I finally decided to try to identify the problem by removing the freezer door and all of the shelves and shelf tracks (easily removed with only a phillips screwdriver). Then I removed the bac
... Read more
k plastic panel to expose the cooling coils, which were partially encased in ice. I deduced that the evaporator fan motor was failing, which blows air over the freezer cooling coils and forces the cool air up into the upper refrigerator section (which was not staying cold). I then found and ordered the fan motor from part select. Their search function and exploded drawing schematics made it easy to identify the part and part number. It seems the original part number had been superceded with a new number, which I ordered. Once it arrived after about a week, I transferred the fan blades from the old motor to the new fan motor, and after completely drying out the freezer compartment, I reinstalled all of the parts and plugged in the unit and waited. By the next day, the refrigerator was operating at peak efficiency, and the ice buildup in the freezer has not returned. I was very close to scrapping the entire refrigerator as junk, but with a little diagnostic effort and about $110 for the new motor, I have a fully functioning refrigerator again. Thanks to Part Select for a great experience.
Read less
Was this instruction helpful to you?
Thank you for voting!
- Customer:
- Debbie from Waltham, MA
- Parts Used:
- 6600JB1010A
- Difficulty Level:
- A Bit Difficult
- Total Repair Time:
- 30 - 60 mins
- Tools:
- Pliers, Screw drivers
Remove and replace light switch
Video makes it look easy. Kenmore refrigerator does not have "groove" along the right hand side of switch that allows for pushing down on release. Used a thin screwdriver to get under to push while holding switch edge with pliers. Kept slipping. Tape sides to avoid scratching inside of refrigerator.
Was this instruction helpful to you?
Thank you for voting!