

Like what you're reading?
Get your fix of expert articles delivered straight to your inbox!
Oops! Please double check your email address.
No Thanks - I don't like cool stuff


The world today is one of extremes: more marathoners than ever before and simultaneously more computer jobs than ever before. While doctors are rejoicing at the increased exercise potential of new athletes from the standpoint of longevity, chiropractors and physical therapists are also reaping the benefits as workers who spend their days sitting at computers then push their bodies to new limits without properly conditioning their muscles and tendons first. However, spending 10 minutes in the morning or just before a run with a foam roller can provide substantial benefits by drastically reducing the risk of injury and also making way for a more enjoyable run with looser, more engaged muscles.
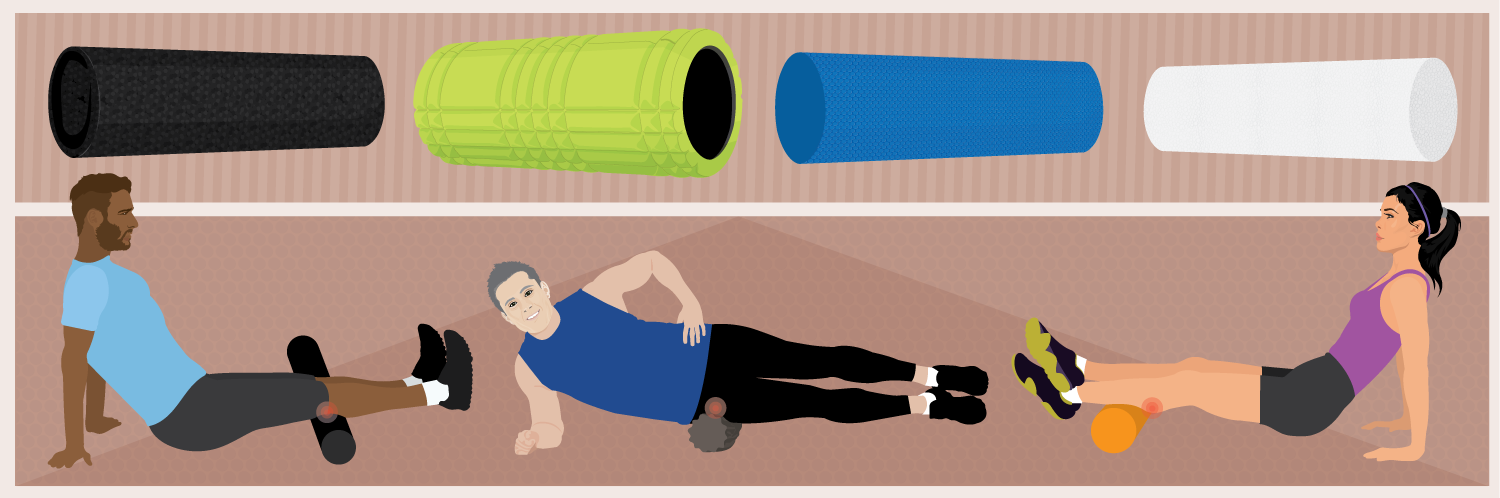
Foam rolling, when done properly, can have innumerable benefits, but if done improperly, can be harmful, just as with any other physical activity. It is best to have someone demonstrate proper foam rolling technique in person if possible, but if that is not available, these illustrations and techniques should be gentle enough to help, not harm.
Foam rolling works on the principles of self-myofascial release (SMR): imagine that your muscle fibers are all your hands interlocked and pulling against one another. SMR uses pressure to relax the muscle fibers. Foam rolling is the pair of bookends to your workout, or day. Start with SMR, then progress to mild dynamic stretching, then work out, then perhaps some static stretches, then SMR. You needn’t spend more than 10 minutes on the practice, unless you have quite a lot to roll out!
The amount of pressure that is needed is entirely dependent on the area and your pain threshold. You want enough pressure to cause a sense of discomfort, but not pain, or, at the very least, to feel beneficial. You may have heard that foam rolling “hurts so good” and that is exactly how it should feel: uncomfortable but not painful. If you experience pain, do not force the issue and keep after the area. The best solution would be to enlist the help of an experienced practitioner to help you pinpoint the problem or, alternatively, rest, but you can also try to roll or thumb massage the areas around the painful area in order to relax the surrounding connection points and thus release tension on the tender area.
Think of a walk in the park, not a sprint! Speed gains you no points. The speed of movement should be akin to a slow dance, whether you are pointing and flexing or rolling back and forth.
The feet are often abused and just as often forgotten when it comes to a pre-run warm up. But your feet shouldn’t get love only when you go to the nail salon. Give yourself your own foot massage with the aid of a lacrosse, tennis, or golf ball, which can also be frozen for acute desensitizing, and warm up your tendons and fascia, including the infamous plantar fascia. Doing so will help to prevent injury and give you greater “pop” from the ground, thus leading to faster and stronger strides as well as decreasing the likelihood of overworking your soleus and Achilles.
Rolling out the soleus and bottom 25 percent of the leg will assist with the ability to push off from the ground. If this part of the leg is stiff or tight, the runner can risk injuries such as tendon strains and even plantar fasciitis, due to the connection points of the various tendons.
From a seated position on the floor, stretch your legs out in front of you (ala a forward bend) and then place the foam roller underneath the lower 25 percent of the leg. If you are used to foam rolling and also do not have overly tight muscles, place your other leg across the leg getting worked on, creating a “4” with your legs. Increase the pressure by lifting yourself off the floor, pushing up on your palms beneath you.
To roll out the lower 25 percent of the leg, first begin with the roller placed between the bulk of the calf (the gastrocnemius) and the ankle. Rotate the ankle from side to side for 15-30 seconds. After finishing this movement, roll backward and forward across the roller so the roller goes down to the heel and back up to the gastrocnemius, for 15-30 seconds. Lastly, place the roller back to the area between the gastrocnemius and the heel, and flex and point the toes for 15-30 seconds.
You are next going to move to the “meaty” part of the lower leg, the gastrocnemius. Working out the kinks in this muscle will help protect it from strain in case the gluteal muscles are not sufficiently engaged – the bane of all running coaches’ existences.
To roll out the gastrocnemius, you will use the same strategy as with the Achilles/soleus area, but realize that you may not be able to achieve the same amount of rotation in certain directions due to the structure of your leg.
Begin with the roller placed under the bulk of the calf (the gastrocnemius). Place lower leg across the leg on the roller to increase weight. Rotate leg from side to side for 15-30 seconds.
Roll backward and forward across the roller for 15-30 seconds so that roller goes down to the soleus and back up to the back of the knee.
Place the roller back to the area under the gastrocnemius, then flex and point the toes. Do this for 15-30 seconds.
The lower quadriceps area is incredibly important, not so much from a speed and power standpoint as with regards to structure, stability, and support. These are the muscles and tendons that have direct contact and interaction with the knee, and so many runners deal with knee problems or the infamous ITBS (iliotibial band syndrome, a very painful inflammation of the IT band that can sideline runners for months and can become chronic). Rolling in this area will help prep these muscles for work and, with proper gluteal engagement, can keep you running for miles.
It is important to note the change in body positioning for these moves – move to your side, lying on your hips, place the roller, lift your hips off the ground, and lean slightly forward – about 45 degrees. Hold your upper body off the ground.
Lie over the roller, holding your upper body up with your arms, and place the roller underneath the outer quadriceps right above the knee. Rotate your leg from side to side for 15-30 seconds.
Roll backward and forward across the roller for 15-30 seconds so that the roller goes down to the knee and up the outer quadriceps to the hips.
Place the roller back to the first position, then curl and extend the lower leg for 15-30 seconds.
Maintain the body positioning from the lower quadriceps rolling and progress down the roller so that it follows the same muscles but is up closer to the hips. Use the same techniques as the lower quadriceps, only at the upper part of the leg. Working this area will start to loosen up the rest of the leg as well as the hip flexors, which are often incredibly tight in women as well as those of us who spend the majority of the day in a seated position.
Lie over the roller, holding your upper body up with your arms, and place the roller underneath the outer quadriceps, right beneath the hips. Rotate the leg from side to side for 15-30 seconds.
Roll backward and forward across the roller for 15-30 seconds so that roller goes down to the knee and up the outer quadriceps to hips.
Place the roller back to the first position, then curl and extend the lower leg for 15-30 seconds.
Proper gluteal strength, activation, and engagement are critical for power as well as endurance. Without properly firing glutes, the rest of the leg is forced to pick up the slack and ends up overworked, strained, and perpetually tired. Not to mention, you can end up with serious injuries, from hamstring strains and tears to ITBS and knee issues, all because the other muscles are too fatigued to properly support the knee.
Another huge benefit of gluteal work is that properly firing glutes will stabilize and protect the hips, the sacroiliac joint, and the lower back.
Tapping into the gluteal muscles will not only provide structural benefits but will also unlock the power of the largest and strongest muscles in the body. When it is time to sprint or gain elevation, you tap into your glutes – why not utilize that power elsewhere and improve your speed and efficiency?
Rolling out the glutes is a great way to start engaging and activating these muscles. Find the midpoint between your body position for the quadriceps rolling and the lower leg rolling (your face should be about 45 degrees from perpendicular, but facing up).
Sit with the roller underneath the meaty part of the glutes with your body at about a 45-degree angle to the ground. Rotate your body from side to side for 15-30 seconds.
Roll backward and forward across the roller for 15-30 seconds so that roller goes across the entire glute musculature.
Place the roller back in the first position, then curl and extend the lower leg for 15-30 seconds.
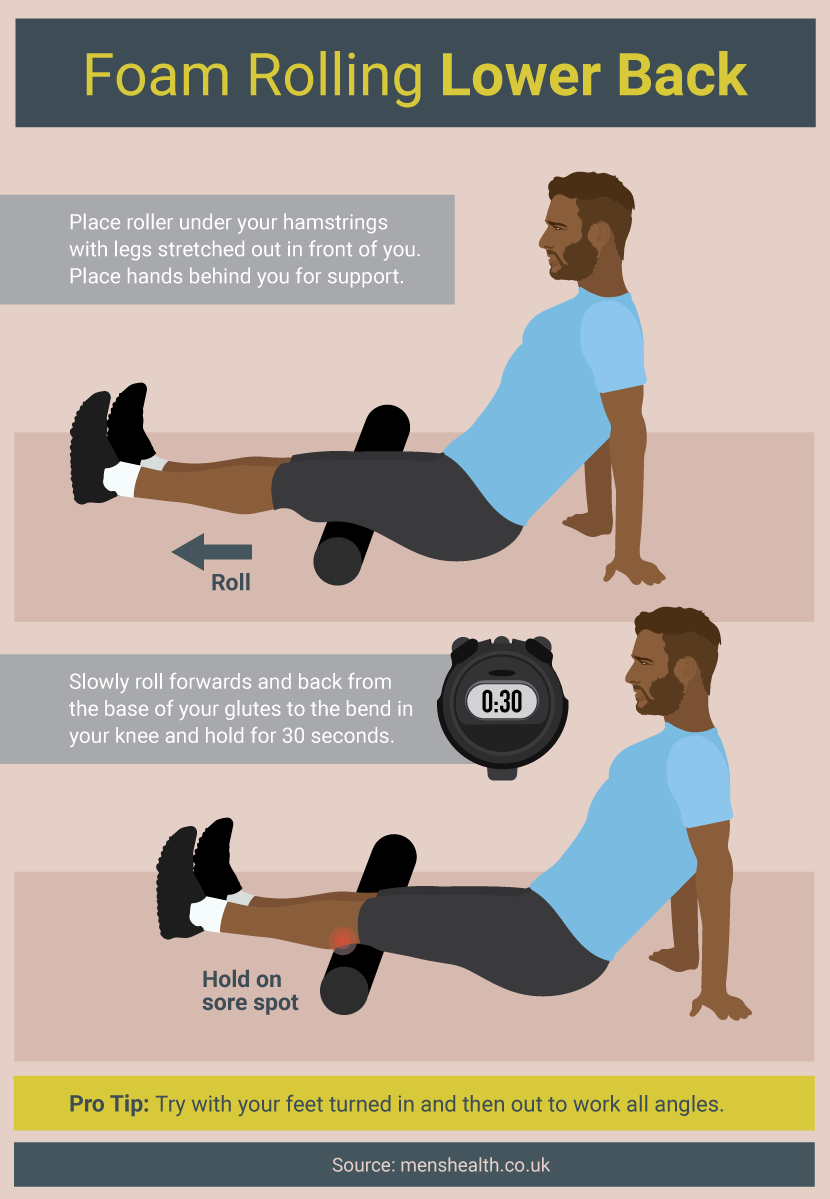
Now you are ready to run! Or are you? Why not hit your warm up out of the park and give your lower back some love – it and you both deserve it! I like to use a lacrosse ball for this, but I suggest starting with the roller and progressing first to a tennis ball and finally to a lacrosse ball.
After rolling out your legs and glutes, lie back on the ground and bend your knees (bringing your feet close to your glutes). Take either the roller or ball of choice and place underneath the arch of your lower back. If using the roller, start to gently roll back and forth – you might move your feet a bit further from your torso and use your feet to pull and push. If using a ball, place it underneath the meaty part of the lower lats on one side of your spine and gently move your body in circles. Repeat on the other side. Finish out by removing the roller or ball and bringing your legs up to your chest into a little ball and giving your legs a squeeze.
Now you are ready to have your best run ever! When you get back, maybe give some love to those areas that are feeling overworked, or go through the entire sequence again for a shorter interval – up to 15 seconds, rather than for a minimum of 15 seconds.
Don’t you feel better? Run long, happy, healthy, and injury-free!
Embed the article on your site

Written by:
Sit-ups alone aren't going to get you sculpted abs. With a few simple chang...
Your body requires a balance of flexibility, mobility, and stability to tak...
The beach is a great place for a workout! Learn how you can incorporate the...
Get your fix of expert articles delivered straight to your inbox!
No Thanks - I don't like cool stuff