

Like what you're reading?
Get your fix of expert articles delivered straight to your inbox!
Oops! Please double check your email address.
No Thanks - I don't like cool stuff


Most everything we gardeners grow is planted for a reason. We grow vegetables to feed our families and flowers to feed our hearts and souls. Gardeners who enjoy making things will also grow plants for crafting. For those interested in flexing their crafting skills, there's no better garden investment than planting flowers that can be dried and used for crafts right next to the veggies and herbs.
Although they’re not officially a botanical category, dried flowers or “everlastings” are flowers that keep on giving long after they've been cut from the plant. Species within this group basically consist of flowers, leaves, seed pods, and stems that hold their shape and color well after they dry out. This trait makes them extremely attractive to the crafty among us.
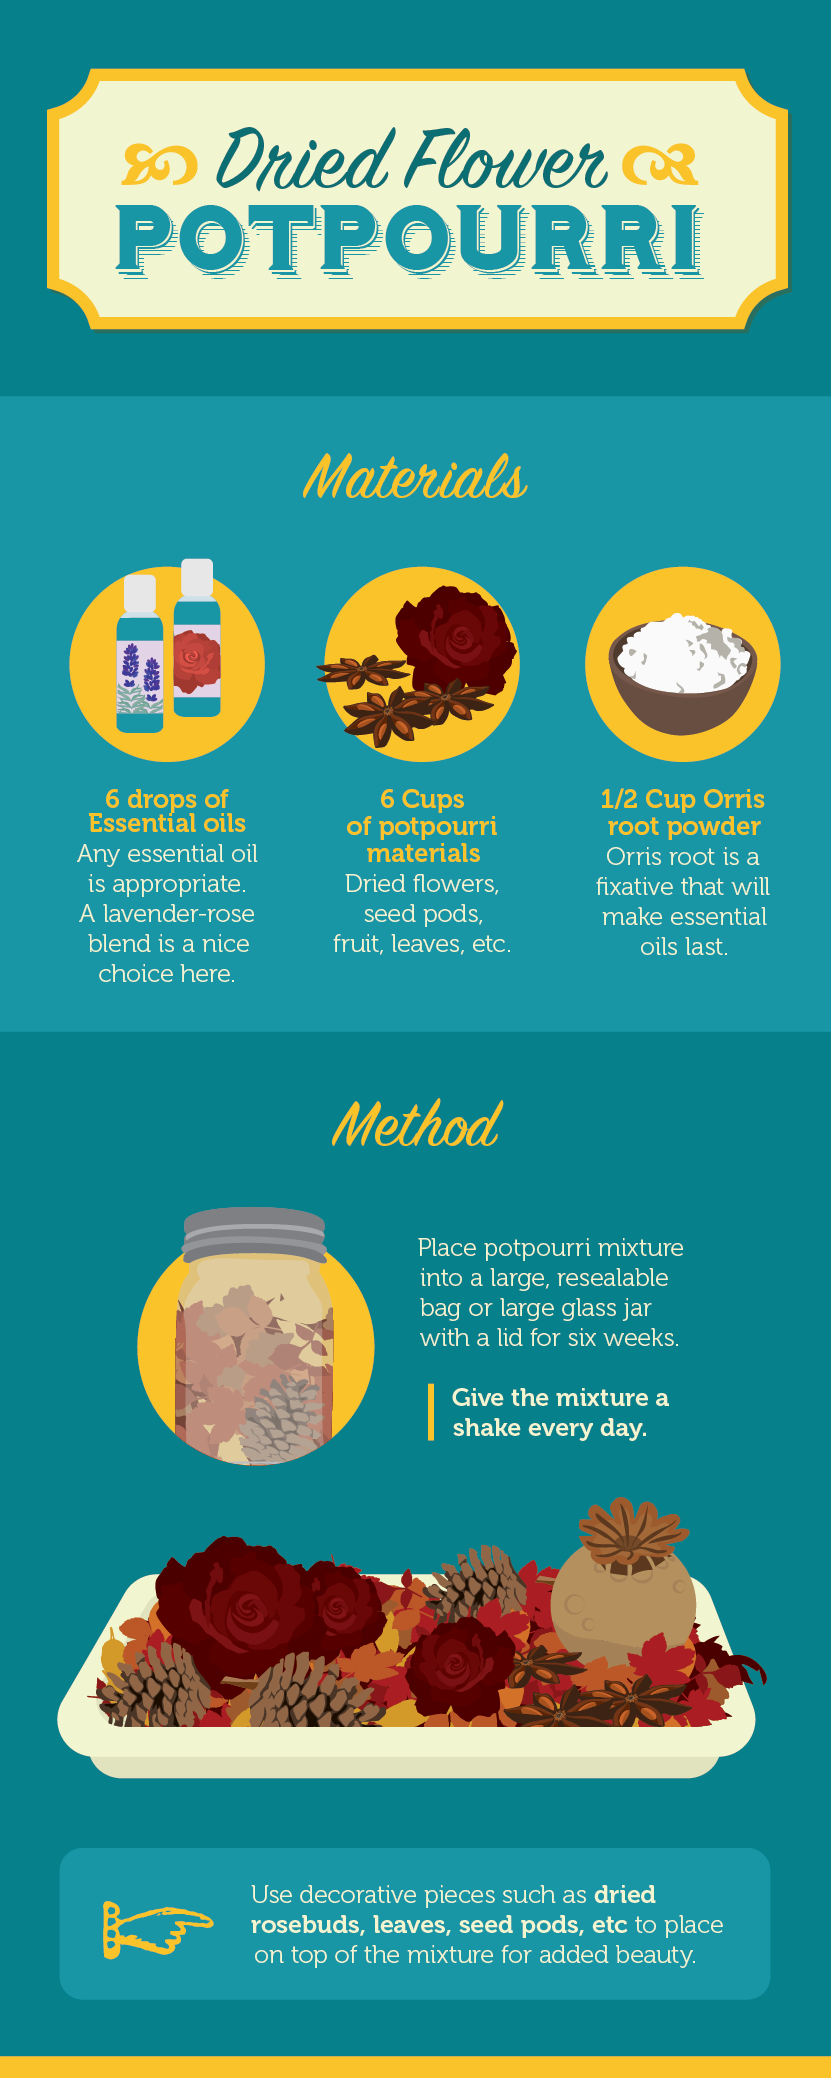
One of the best things about growing dried flowers is that they lead a double life. First, you can bring them into the house to enjoy them as fresh-cut flowers; later, you can dry them for use in homemade candles, perpetual flower arrangements, potpourri, tea, cards, wreaths, soap, drawer sachets, and tons of other handcrafts.

With dried flowers on hand, it’s easy to add a special touch to an otherwise-common item. For example, plain pillar candles can become custom pieces by placing dried flowers or leaves onto the sides of the candle and then dipping the entire candle into clear wax. Once the wax is dry, you have a one-of-a-kind decoration or gift.
Dried flower petals are the most obvious part of the plant used for crafting. However, some everlastings are grown for their seed pods, which show up soon after the flowers have gone. These pods are just as beautiful and often even more interesting than the flowers themselves.
When harvesting flowers to dry, choose blooms that are as young and unblemished as possible. Keep in mind that insect damage will become more noticeable as the flowers dry.
Cut flower stems from the plant in the late morning on a dry day. By 11:00 am, the dew will have evaporated from the plant but the afternoon sun will not have had time to wilt the flowers. Cut the stems as close to the base of the plant as possible since a long stem makes the flowers easier to work with.
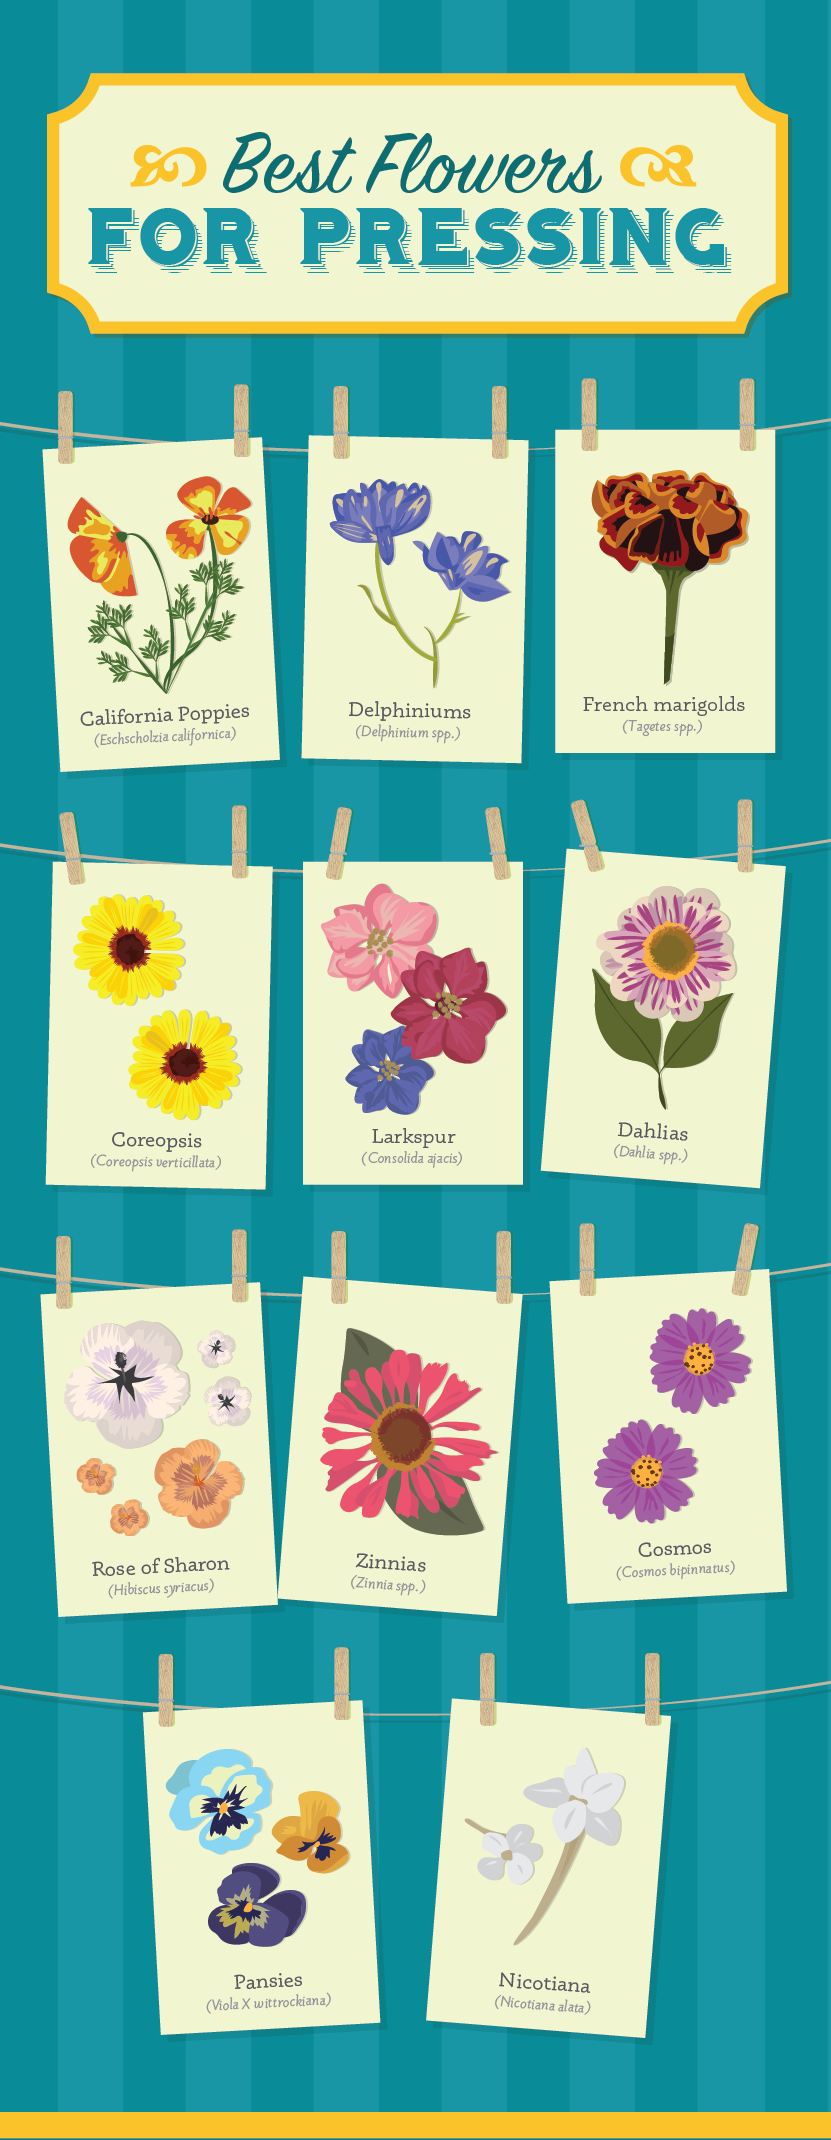
Below is a list of annual flowers that work well as everlastings for craft projects. Annual plants live out their lives in a single year (season), so they need to be replanted the following year (although some of them will readily reseed themselves).

Once established, perennials come back year after year, often bigger and better.
Crafters dry flowers using a variety of techniques, including microwaves, ovens, glycerine, silica gel, hang drying, and flat drying. Hang drying is my favorite since it’s the easiest, least-expensive technique.

Some flowers will dry beautifully when they are simply placed upright into a vase or a jar. Add about three inches of water to the vase and let them be. By the time the water evaporates, the flowers will be dry and ready for crafting. Try this technique with Baby’s Breath, Chinese Lanterns, Poppy seed pods, and Nigella seed pods.
Once your flowers and seed pods are completely dry, they need to be stored properly so you can use them later. Here are some storage tips:
Think of this article as a dried flower guide, and feel free to try drying any flower that strikes your fancy. Many of them will surprise you with how well they turn out, while others will disappoint. After some experimenting, the types of plants that tend to hold up well (and retain their color) will become obvious.
Embed the article on your site

Written by:

Get a squeaky clean home without the harmful chemicals. Use our guide to ma...

These frugal design hacks are a great way to introduce Scandinavian element...

Making your own candles is a fun and inexpensive way to brighten up your ho...
Get your fix of expert articles delivered straight to your inbox!
No Thanks - I don't like cool stuff