Commonly referred to as dog ears, these agitator directional cogs are manufacturer approved replacement parts that come in a package of 4 and are usually used with direct drive washing machines. We re...
This is an OEM direct drive motor coupling, which provides a cushioned connection between the transmission and the motor shaft. This is the newer version of this part, made with new metal sleeves for ...
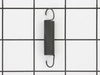
This suspension spring is a genuine OEM replacement part for a variety of washers and washer-dryer combos. The primary purpose of the suspension spring is to support the outer tub and keep the tub ste...
This is a genuine OEM replacement clutch assembly for your washing machine. A clutch assembly, also known as a clutch or a washer clutch, is responsible for spinning the tub during the spin cycle. If ...
This bolt is a genuine OEM replacement part, used to secure the agitator in your washing machine. Overtime the bolt can become worn out due to the vibrations of the washer, and will need to be replace...
On the lid on your washing machine there is a pin that engages with the lid switch. This works by telling the machine that the lid is closed which then allows for the washer to start. If your washer i...
The thrust spacer is a genuine OEM part that is more commonly known as a retainer ring. The spacer is made of white plastic and measures approximately 2.5 inches in diameter. This part is found in bet...
This agitator repair kit comes with a long cam, a thrust spacer and four dogs ears (agitator cogs). This repair kit is used to move the upper agitator and it connects the base of the agitator with th...
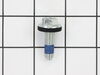
This is a multi-use screw and can be used on a variety of appliances. The measurements of the screw are: 8/18 x 3/8. *Please note: the screw is sold individually. Refer to the manual provided by the m...
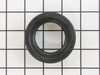
Also known as Main Outer Tub Seal. This part helps to prevent leaking from the bottom of the tub.
In Stock
Questions and Answers
Ask our experts a question about this part and we'll get back to you as soon as possible!
2 questions answered by our experts.
< Prev
1
Next >
Sort by:
Search filter:
Clear Filter
Your search term must have 3 or more characters.
Keep searches simple. Use keywords, e.g. "leaking", "pump", "broken" or "fit".
Sorry, we couldn't find any existing answers that matched. Try using some different or simpler keywords, or submit your new question by using the "Ask a Question" button above!
Steve
October 23, 2023
My washer shakes and vibrates in the spin cycle.
For model number RTW4440XQ0
Hello Steve, thank you for reaching out. Based on the description that you have provided, we would recommend checking the suspension spring, part number FIX11743345, to fix the issue. We hope this solves your problem!
When you try to start it clicks then homes like something is locked up
For model number RTW4440XQ0
Hi Tony,
Thank you for your question. If your washer will not start, there are some parts that you will need to check to see which one is causing the issue. You will need to check the lid switch, the drive motor and the timer. We have included a link that you may reference on how to check these parts and some others as well. Once you have determined the part you need, please feel free to call customer service. We are open 7 days a week and anyone will be happy to assist you. We look forward to hearing from you!
The job looked intimidating but turned out to be very easy. First take off the water pump by removing the two clips that hold it in place. Place a shallow pan under the pump to catch the water that is in the pump and hoses. Open the hose clamps with a pair of pliers or channel locks (better) and slide the hoses off of the water pum
... Read morep. The motor comes off next. Unplug the electrical connector from the motor and two wires from the capacitor. Remove the two screws holding the clamps in place and then pop off the two clamps. You will need to hold up the motor with one hand while you remove the clamps or it will fall to the floor once the clamps are removed. One piece of the coupling assemble will be attached to the motor and the other will be attached to the gearcase drive shaft. If you want to clean up the mess created by the shredded rubber center piece of the coupling assembly you will have to take off the motor mounting plate. It is held on by two bolts and removing it makes installing the coupling easier but probably not necessary. Push the back half of the coupling on to the gearcase drive shaft until the shaft is flush with the face of the coupling. Install the new rubber center piece on to the coupling then re-install the motor mounting plate. Install the other half of the coupling on to the motor shaft and lift the motor up to the coupling. You have to rotate the motor shaft by spinning the fan blades until the coupling lines up so you can slide it into the other half of the coupling. Then just reattach the motor, connectors and water pump in the reverse order of disassembly.
Read less
1091 of 1172 peoplefound this instruction helpful.
First pry off the cap of the agitator. Then using a socket remove the bolt that holds the plastic cup in place. Remove this cup by prying it loose from the two tabs that hold it in place. Once this cup is removed you can get to the broken cogs. Slip the new cogs into the underside of the cup, and slide the cup back down in the a
... Read moregitator housing using the slots on the side for a guide. (You may want to remove the entire agitator and assemble everything upside down, then flip it all back over to mount, so the cogs don't fall out). Tighten the bolt, snap the cap back in place on top of the agitator and your'e done. Easy repair.
On top of the agitator is a flat cap that is held in place by the friction of an o-ring, there are no fasteners. I would imagine one could get under the lip with a small screwdriver or butter knife to pop it off but I chose simply using my fingernails so as to not disfigure the cap. Under the cap you will find the head of the only bolt
... Read morethat holds the assembly together it is a 7/16 head and because it is in a 4" deep well your will need a 6" extension for your ratchet. Once the bolt is out the top of the agitator, the assembly with the cogs removes by hand. Set the assembly upside down on the counter, slide the black plastic ring off, pull the cogs out with your fingertips, install the new cogs put a new black ring on and set the assembly back in the agitator. Reinstall bolt. As the bolt is down in a tube, you cannot set it in place with your fingers and it will fall out of the socket. To hold the bolt in the socket during positioning you can either put a gob of Vaseline on the bolt head to hold it in the socket or form a small piece of paper over the bolt head and set it into the socket, the friction of the paper will hold the bolt into the socket. Took me less then 10 minutes, good luck


 Diagram and Parts List for Roper Washer")