


How to Fix a Rotor Sensor for a Washer That Has Spinning Issues
The rotor positioning sensor plays an important role in controlling the spin cycle in your washer. It works with the electronic control board to keep your washer spinning appropriately. The rotor may be damaged or experiencing an electrical failure. You will need to inspect it and test it with a multimeter to determine if it is the cause of your washer not spinning. By the end of this guide, you will feel confident in your ability to restore your washer to full working order by finding your machine's rotor positioning sensor and diagnose it.
What is a Rotor Positioning Sensor?
The rotor positioning sensor monitors the direction and speed of the spinning rotor and communicates this information to the electronic control board. If the sensor is defective, it will not be able to communicate this information and the tub may not spin at the correct speed or may not spin at all.
Where is the Rotor Positioning Sensor Located?
This part is found clipped to the stator - the part of this assembly that helps rotate the inner-tub - which is found underneath the rotor underneath the tub assembly on a top-load machine, or at the back of a front-load washing machine.
General Location of the Rotor Positioning Sensor in a Top Load Washer

General Location of the Rotor Positioning Sensor in a Front Load Washer

FIX TIP
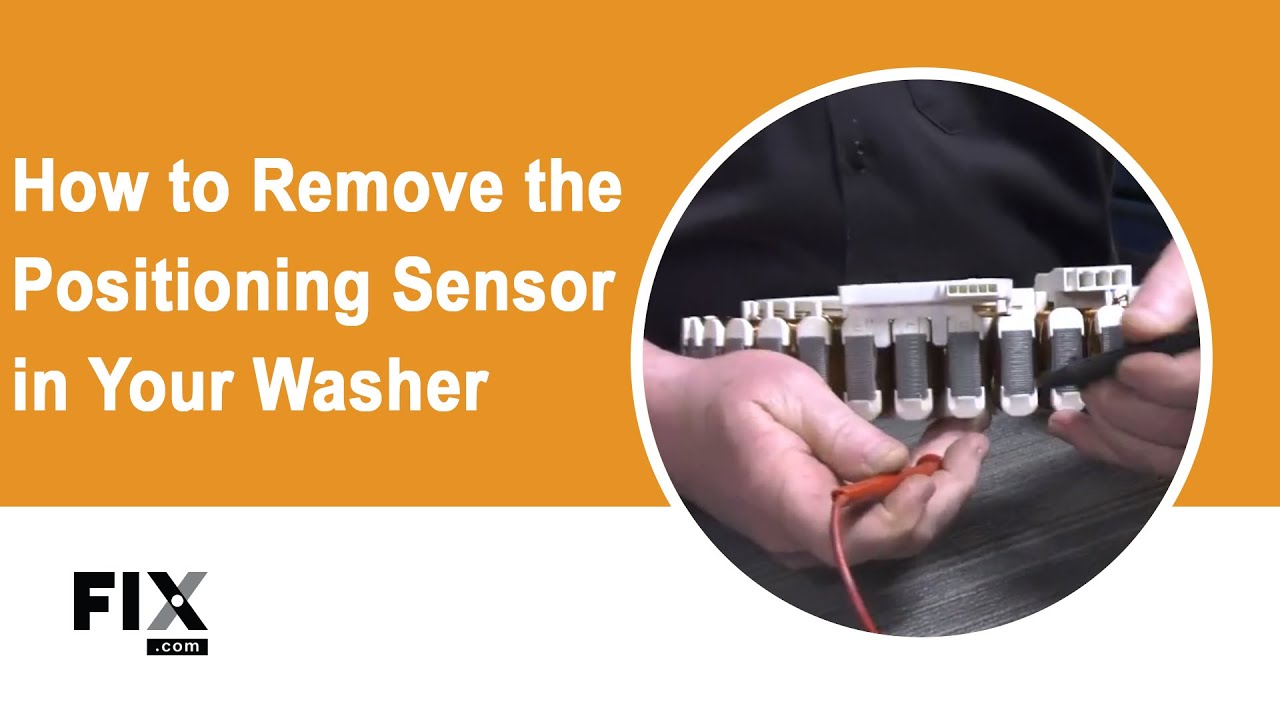
How to Access, Remove, and Inspect a Rotor Positioning Sensor
- You will need to disconnect the power and water supply to the washer and pull it out from the wall to access the back panel.
- Next, remove the back panel from the washer.
- If your top-load washer has a rotor positioning sensor, it will be found at the bottom of the machine, and you will need to place the washer on its back to access it.
- Then you will need to remove the bolt that holds the rotor in place and remove the rotor.
- Once the rotor is out of the way, you have access to the stator, which the rotor positioning sensor is clipped onto.
How to Test a Rotor Positioning Sensor
Once you've removed your positioning sensor, it might be best to have a technician cover the diagnosing portion of this repair, if you're not comfortable with it. You will need your washer's schematics to identify which terminals to test.
- Attaching your multimeter's probes to the correct terminals, you'll want a reading of 10,000 Ohm's.
- If you don't see a reading of 10,000 Ohm's, you'll need to replace your sensor - and in some cases, that may also mean replacing your entire stator, or machine.
- In most cases of a rotor positioning sensor not working properly, it's more time and cost-efficient to purchase a new machine. So consider continuing with a repair like this, at this stage of the repair process!
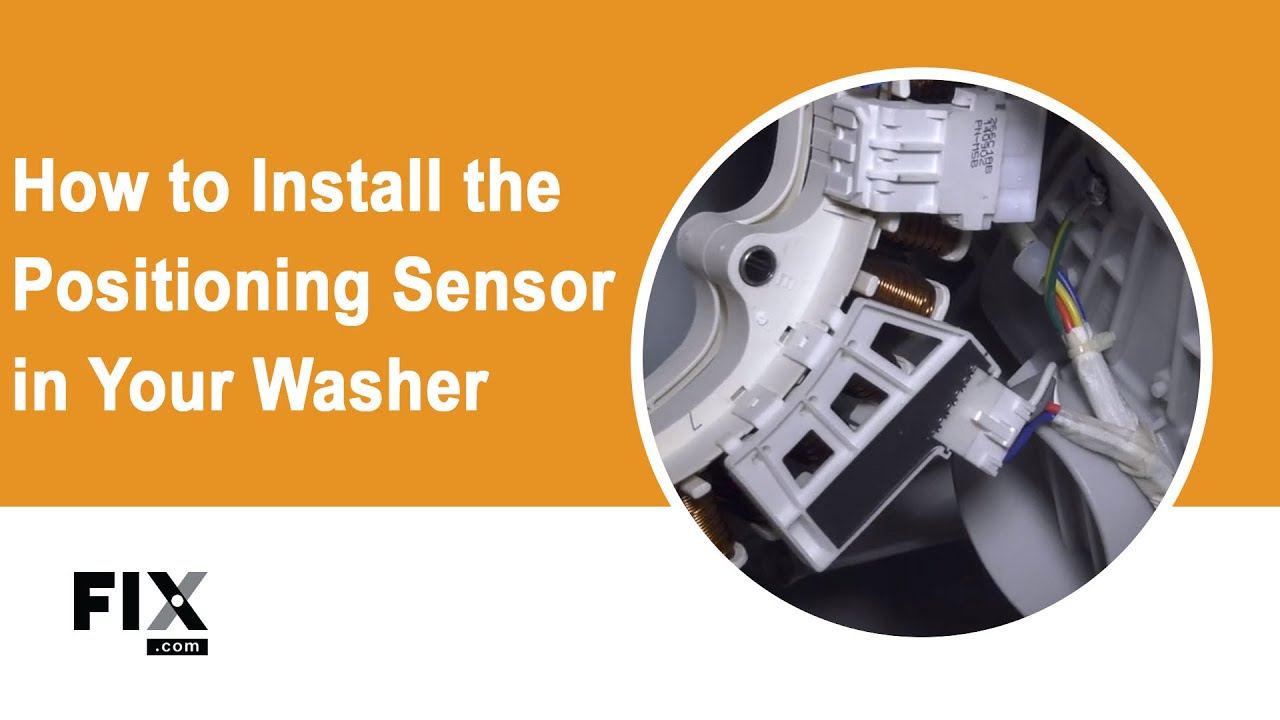
How to Install a New Washer Rotor Positioning Sensor
- Attach the new rotor positioning sensor onto the stator, lining up the tabs and snapping it into place.
- Then reattach the wire harness.
- Line up the stator assembly on the tub shaft, push into place, and secure with mounting bolts.
- Then you can reinstall the rotor. Refer to your manufacturer’s recommendations, as many suggest using a drop of Blue Loctite on the threads when reassembling the machine. Once installed, your repair is now complete!
Next: Troubleshooting the Timer
Go To Main Page: Spinning Issues