


How To Repair A Noisy Trash Compactor
- Rated as REALLY EASY
- 2 repair stories
- 4 step by step videos
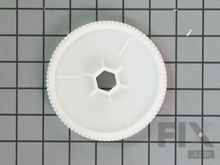
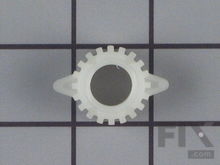
Drive Gear
If your trash compactor is making an unusual noise, the problem may be with the drive gear. The drive gear is located at the bottom of the unit and drives the chain that operates the drive screws. The drive gear is normally made of plastic and may be broken or have some damaged teeth which can create an unusual noise. To check the drive gear you will have to remove the unit from the cabinets and disconnect the power. Remove the bottom panel and inspect the drive gear for damage. Check the motor gear and the power screw sprockets and chain as well. Replace any damaged gears and lubricate with grease. Check to see that the chain has the correct tension of about a ½ inch deflection.

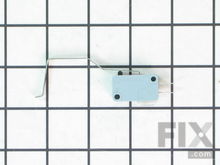
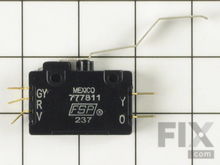
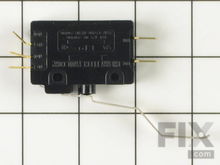
Top Limit or Directional Switch
If your trash compactor is making a loud banging or thumping noise, you may have a problem with the top limit/directional switch. Often referred to as the directional switch, it is a multifunction switch and is located at the top of the unit and is activated by a metal tab on top of the ram. The directional switch is used to control the direction of the motor and ram travel, while the top limit portion of the switch is used to stop the motor at the end of the cycle. If the top limit switch contacts become welded closed the motor may keep running and the ram or power screws will start slipping in the power nuts and create an unusual or banging noise. You can check the top limit/directional switch for continuity with a multi-meter. Remove the unit from the cabinets and disconnect the power. Next, remove the mounting brackets and then the top panel. Verify that the tab on the top of the ram is contacting the switch lever properly and adjust if necessary. Remove the ram using caution not to damage the switch lever. Remove the switch and the wires from the terminals and then check for continuity with a multi-meter. You may require the electrical schematic for your model to determine the proper terminals to check. The top limit switch should have terminals marked C for common and NC for normally closed. With the switch lever depressed there should not be any continuity between these terminals. Replace the switch if required and then verify the proper adjustment for the activating lever.
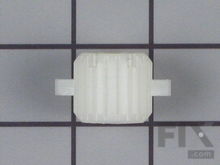
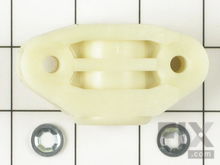
Power Nut
If your trash compactor is making an unusual noise, the problem may be with the power nuts. The power nuts, sometime referred to as trunnion nuts, are attached to the ram and are driven by the power screws. When the power screws are rotated in one direction, the ram will compress, and when rotating in the opposite direction the ram will raise to the top position. If the power nuts become stripped or damaged, they will often create a loud thumping noise. To inspect the power nuts you will have to remove the compactor from the cabinets and disconnect the power. Remove the mounting brackets and the top panel for a visual inspection. If the ram is in the down position you will have to lay the unit down and remove the bottom panel. You can then rotate the drive gear to raise the ram. You can now remove the ram to closely inspect or replace the power nuts. Tape the direction switch lever to prevent damage when removing and replacing the ram. Lubricate the power nuts with grease before you reassemble.
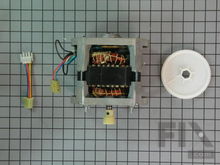
Motor Gear
If your trash compactor is making an unusual noise, the problem may be with the motor gear. The motor gear is attached to the shaft of the drive motor that is located at the bottom of the unit. The motor gear meshes with the larger drive gear which drives the chain that operates the drive screws. The motor gear is normally made of plastic and may be broken or have some damaged teeth which can create an unusual noise. To check the motor gear you will have to remove the unit from the cabinets and disconnect the power. Remove the bottom panel and the large drive gear. Inspect the motor gear for damage. If the teeth are damaged or stripped, you will have to replace the gear, or on some models, the motor and gear assembly. Check the drive gear and the power screw sprockets and chain as well. Replace any damaged gears and lubricate with grease. Check to see that the chain has the correct tension of about a ½ inch deflection before you reassemble the unit.
More Repair Parts
Still not sure which part is broken? We can offer you custom troubleshooting help if you search with your model number.