


Models
>
L3581XRA
L3581XRA Norge Wall Oven
Jump to:
Find Part by Name
Keep searches simple, eg. "belt" or "pump".
Diagrams for L3581XRA
Viewing 4 of 4


Keep searches simple, eg. "belt" or "pump".

$11.75
This is a genuine OEM 40-Watt replacement light bulb that is compatible with various types of appliances. It has a frosted glass bulb with a standard metal socket base, making it easy to screw and uns...
In Stock

$67.36
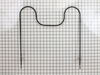
This oven bake element with push-on terminals has a terminal depth of three inches, making a total element length of nineteen inches.
In Stock

$90.79
This is an oven rack for your range. It is a stable surface for your cookware to sit when baking and broiling. It measures to be roughly 23 inches wide and 16 inches long. It is made of durable metal ...
In Stock

$20.83
This is a screw and it is made for multiple appliances in your home. This model is called a sheet metal screw because it has sharp points, and the threads are closer together. This screw is designed t...
In Stock

This infinite switch for eight inch range burners is almost three inches long. This infinite switch is for 8-inch range burners. When an element is unable to produce any heat on a modern oven, the pro...
In Stock

In Stock

$34.15
It provides a way of connecting individual electrical wires and offers protection of the device from electrical surges (voltages and/or currents).
In Stock

$61.37
This door seal is fifty-three inches long. It is all black in color and is made of rubber. There are metallic clips sticking out of this seal at various points. These clips help to secure the seal to range doors.
In Stock


In Stock

In Stock

$11.52
This rear drawer support clip is an inch long. It is all black in color and is made entirely of plastic.
In Stock
Questions and Answers
We're sorry, but our Q&A experts are temporarily unavailable.
Please check back later if you still haven't found the answer you need.
Common Problems and Symptoms for L3581XRA
Viewing 7 of 7Little to no heat when baking
Fixed by these parts


How to fix it
Element will not heat
Fixed by these parts


How to fix it
Will Not Start
Fixed by these parts
How to fix it
Oven not heating evenly
Fixed by these parts
How to fix it
Oven is too hot
Fixed by these parts
How to fix it
Touchpad does not respond
Fixed by these parts
How to fix it
Door won’t close
Fixed by these parts
How to fix it


Keep searches simple. Use keywords, e.g. "leaking", "pump", "broken" or "fit".
- Customer:
- mike from gold bar, WA
- Parts Used:
- WP74003019
- Difficulty Level:
- Really Easy
- Total Repair Time:
- Less than 15 mins
- Tools:
- Screw drivers
burned in half
put the new element in the oven pushed wire onto connector on element held it up to match holes and put the screws back in, very easy to change. I really like the fast way I receive a part from you.
Was this instruction helpful to you?
Thank you for voting!
- Customer:
- John from Marion, IA
- Parts Used:
- WP74003019
- Difficulty Level:
- Easy
- Total Repair Time:
- 15 - 30 mins
- Tools:
- Pliers, Screw drivers
No heat - element had burst.
Unscrewed 2 screws holding terminal ends of the element in place. Eased the element out, until the two AC power wires were exposed. Pulled off the connectors from the element terminals (pretty tight fit - needed pliers to remove one of them).
Slipped the connectors onto the new element terminals, and eased the element back int ... Read more o the oven wall. Secured the element with the two screws removed previously, and that was pretty much all there was to it. Closed the circuit breakers, and the element tested OK.
Overall, a no-sweat job. One thing, though: I squeezed the oven connectors tight before pushing them back onto the new element. They had loosened up somewhat after pulling them off. A tight connection here seems pretty important, as arcing and corrosion could occur over time if they're too loose.
Read less
Was this instruction helpful to you?
Thank you for voting!
- Customer:
- Glenn from Jupiter, FL
- Parts Used:
- WP74003019
- Difficulty Level:
- Really Easy
- Total Repair Time:
- Less than 15 mins
- Tools:
- Screw drivers
Bake element burnt out
Before you touch anything unplug the range or trip the breaker. Pull the racks out of the oven, it gives more room to work. Remove the two screws that hold the element and pull the element out about 2-3". Disconnect the old element. Before you install the new element check the wire and the connectors for age and heat damage. If the connec
... Read more
tors are loose replace them (2 connectors @ $1.97 is better than a short in the oven). If the insulation on the wire is degraded (brittle, flaking, brown) consider changing out the wiring. This means opening up the back of the oven and that is another chapter. In most cases you can just re-connect to the replacement element and attach it back to the oven with the two screws. I ran the oven to 400 degrees to just check that everything was OK. Spent a couple extra minutes to check everything out and save yourself pain later.
Read less
Was this instruction helpful to you?
Thank you for voting!