


Models
>
LLMXS3006S
LLMXS3006S ((ASTCNA0)) LG Refrigerator
Jump to:
Find Part by Name
Keep searches simple, eg. "belt" or "pump".
Keep searches simple, eg. "belt" or "pump".

$9.37
This part includes a single mounting bolt needed to secure the door handle to your refrigerator. This part is commonly replaced because the handle has started to loosen. Try tightening the screw first...
In Stock

$48.70
Refrigerator Air Filters are a key component for neutralizing odors and ensuring a fresh stream of air into your refrigerator. Swapping your old filter out for a fresh one isn’t difficult and should t...
In Stock

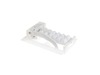
$22.88
This is a manufacturer-approved refrigerator door closure for your refrigerator. It is made of white plastic and measures approximately 3 inches by 2 inches. If your old closure is damaged, your refri...
In Stock

$81.19
The Water filter reduces contaminants such as lead, iron, and chlorine from drinking water. This OEM filter is a genuine part manufactured by LG for use in refrigerators. We recommend you replace eve...
In Stock

In Stock

In Stock

On Order

In Stock

In Stock

In Stock

In Stock

In Stock
Questions and Answers
We're sorry, but our Q&A experts are temporarily unavailable.
Please check back later if you still haven't found the answer you need.
Common Problems and Symptoms for LLMXS3006S
Viewing 4 of 4Leaking
Fixed by these parts


How to fix it
Door won’t open or close
Fixed by these parts

How to fix it
Ice maker won’t dispense ice
Fixed by these parts

How to fix it
Ice maker not making ice
Fixed by these parts
How to fix it

Keep searches simple. Use keywords, e.g. "leaking", "pump", "broken" or "fit".
- Customer:
- Amber from PEORIA, IL
- Parts Used:
- AEQ72909604
- Difficulty Level:
- Really Easy
- Total Repair Time:
- 15 - 30 mins
- Tools:
- Screw drivers
Icemaker quit releasing ice from tray and water was pouring and freezing in ice storage bin
This couldn't have been easier. Two tiny screws in the front needed unscrewed, and then two plastic clips in the middle just had to be popped lose. Finally, you unplugged the power cord. Then, you just needed to reverse the process by plugging the new ice maker in, popping the clips in place, and screwing the two holes back in and turning
... Read more
the whole thing on. Voila! Perfect ice cubes again. And for only a little over $100.
Read less
Was this instruction helpful to you?
Thank you for voting!
- Customer:
- Steve from MUKWONAGO, WI
- Parts Used:
- EAU59551204
- Difficulty Level:
- Easy
- Total Repair Time:
- 30 - 60 mins
- Tools:
- Screw drivers
Ice chute would not open.
Removed ice dispenser and display with small screwdriver from front of the fridge. Pried out the whole piece slowly. This exposed the motor that activates the chute. Plugged in the new motor before any removal to verify the motor was the problem. When it worked, removed old and installed new. 3 screws. Piece of cake.
Was this instruction helpful to you?
Thank you for voting!
- Customer:
- Ronald from WILLIAMSBURG, VA
- Parts Used:
- AEQ72909604, 4510JA3003D
- Difficulty Level:
- Really Easy
- Total Repair Time:
- 30 - 60 mins
- Tools:
- Screw drivers, Wrench (Adjustable)
No Ice
Unplug the refrigerator and empty the freezer. Remove the lower basket and roll out upper tray. Open the freezer door. I was able to lie on the floor to remove the 2 screws holding the ice maker without removing the
freezer door. Depress the 2 tabs and slide the ice maker forward to remove. Install in reverse order. Change the wate ... Read more r inlet valve at the same time.
freezer door. Depress the 2 tabs and slide the ice maker forward to remove. Install in reverse order. Change the wate ... Read more r inlet valve at the same time.
Read less
Was this instruction helpful to you?
Thank you for voting!