


Models
>
MDB9206AWW
MDB9206AWW Maytag Dryer
Jump to:
Find Part by Name
Keep searches simple, eg. "belt" or "pump".
Keep searches simple, eg. "belt" or "pump".

$13.53
This OEM drum support roller kit contains the parts needed to replace one roller on your dryer. This kit includes one drum roller and two bearings. Most dryers use two drum rollers, and it is recommen...
In Stock

$30.95
This OEM kit comes with two ignition coils (one three-terminal boost/hold coil, and one two-terminal secondary coil). Usually only one of them burns out, but you should replace them as a set as both h...
In Stock

If your dryer is noisy while operating, or will not tumble at all, there may be an issue with the drum belt. Over time, the rubber can become brittle and snap, and the belt will need to be replaced. T...
In Stock

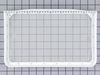
$44.71
This is a genuine OEM replacement lint filter for your dryer. It measures approximately 12.5 inches in length and is made of a nylon mesh material. It is important that your dryer has a lint filter in...
In Stock

If your dryer is making excessive noise, or it will not tumble, there may be an issue with the idler pulley wheel. The idler pulley wheel is attached to the idler bracket and is used to secure the dry...
In Stock

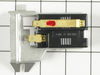
$48.00
This genuine OEM part is a radiant flame sensor for your gas dryer. It is used to determine when the temperature of the igniter is hot enough to ignite the gas. Once the igniter is hot enough, it allo...
In Stock

$38.42
This flat style igniter comes with a wire harness connector. This part ignites the gas within the dryer. Bracket is NOT included.
In Stock

In Stock

In Stock

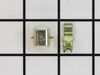
$13.72
This dryer door latch kit comes in two pieces: a door latch, and a door strike. It's used to help hold your door shut to your dryer.
In Stock

$23.35
This timer knob is not quite three inches in diameter. It is all gray in color and it is made entirely of plastic. This has a D-Shaped Shaft.
In Stock

$159.51
This part has a D-shaped motor shaft and this motor runs at 1/4 horsepower and carries 4.5 amps.
In Stock
Questions and Answers
We're sorry, but our Q&A experts are temporarily unavailable.
Please check back later if you still haven't found the answer you need.
Common Problems and Symptoms for MDB9206AWW
Viewing 7 of 7Noisy
Fixed by these parts


How to fix it
Door won’t close
Fixed by these parts
How to fix it
Not Heating
Fixed by these parts


How to fix it
Marks left on clothes
Fixed by these parts
How to fix it
Drum Not Spinning
Fixed by these parts
How to fix it
Touchpad does not respond
Fixed by these parts
How to fix it
Won’t Start
Fixed by these parts

How to fix it


Keep searches simple. Use keywords, e.g. "leaking", "pump", "broken" or "fit".
noisy rollers, broken latch
first, I unplug the power supply of the dryer then I removed the two screws at the bottom of the dryer then pulled out the front part of the dryer,unplugged the blue & yellow wire for the on/off switch for the door,at the back of the dryer I unscrew the pannel for the belt,disconect the belt,and I unscrew the four screws on both side of t
... Read more
he front pannel to remove the front cover of the drum. Once I removed the front cover of the drum I can now remove the drum itself to access the drum support roller. I unscrew the rollers then replace it with the new once. It was an easy job.
Thank you.
Thank you.
Read less
Was this instruction helpful to you?
Thank you for voting!
- Customer:
- Anthony from DeKalb, IL
- Parts Used:
- WP33001808
- Difficulty Level:
- Really Easy
- Total Repair Time:
- Less than 15 mins
Lint into venting area.
Removal of old lint collector and replace with new one.
Was this instruction helpful to you?
Thank you for voting!
- Customer:
- Ron from Monte Vista, CO
- Parts Used:
- WP33001808
- Difficulty Level:
- Easy
- Total Repair Time:
- Less than 15 mins
The old lint screen had a couple tears in it
No problem at all, just took out the old one in front and slid in the new one.
Was this instruction helpful to you?
Thank you for voting!